

This weekend after a “geek fest” in Las Vegas I decided to have a relaxed weekend of tv and “tatting”. Tatting or as the germans would say Schiffchenarbeit (work of the little boat… more masculine… than the french “frivolité”) has been a small hobby of mine since I was young. Unlike crocheting I enjoy tatting and I thought I would post what I tatted this weekend with a follow up video showing others how to do it (That is if anyone is interested)
I usually don’t mind telling other guys that I enjoy tatting since most men do not have any idea what it is . I don’t have to worry about “losing my man card” (not a good idea to share with the guys more than just the word “tatting” …. you quickly become less cool when they see that it is lace and doilies) . If you are asking yourself “why” does he tat? (risking his manly reputation) well… I learned tatting when I was very young from an elderly next door lady and I although I don’t tat often it has stuck with me. There is something about tying knots that I enjoy… plus it looks really easy but is strangely hard. Once I figured it out and was able to “switch” the knot onto the other thread (I will show this on the video) I continued to practice because I was worried I would forget or loose that ability.
I find myself tatting once or twice a year and I usually make something very small. One small project was for Isabelle’s mother. I did it for the first time we met which happened to be during Christmas time. I decided to tat a snowflake. I did this on the plane over and being a little self conscious about doing this in public (yes I am a closet tatter) making a Christmas decoration seemed less “girly” than a “doily”. I was especially pleased when a gentleman on the plane asked me if I was making a fishing net. (that is definitely much more manly… so I lied and said yes)
Here is the pattern for the snowflake I made. This could make a nice Christmas gift.
If you are not familiar with tatting patterns they may look odd. I think tatting patterns are awesome but I think you almost always have to see a picture or a drawing otherwise you would be lost. (well at least I would be… especially for the complex ones often the drawings will even have arrows to show you where to start and which way you will be working)
Here are the acronyms to help understand the pattern. The numbers are how many knots and the “-” is a picot or small loop in between knots. “+” is joining something to an already existing picot.
R = Ring
Ch = Chain
rw = Reverse
DNR = Do Not Reverse
Part One (inner part of the snowflake):
R 4 – 3 – 4 rw
Ch 4 – 2 – 2 – 4 rw
R 4 + 3 – 4 rw
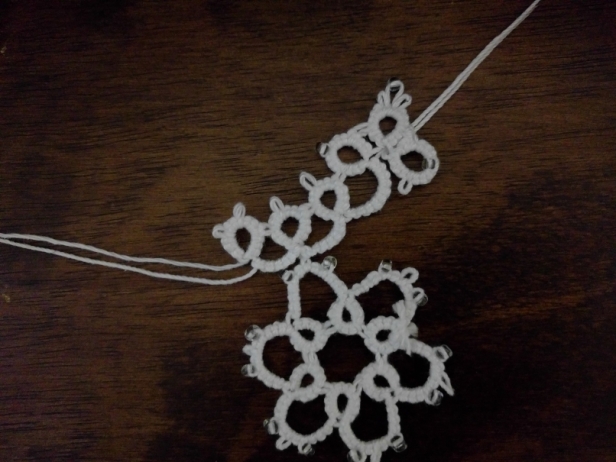
Continue around for a total of 6 rings and 6 chains,
join to base of first ring and chain. (joining the rings as seen below)
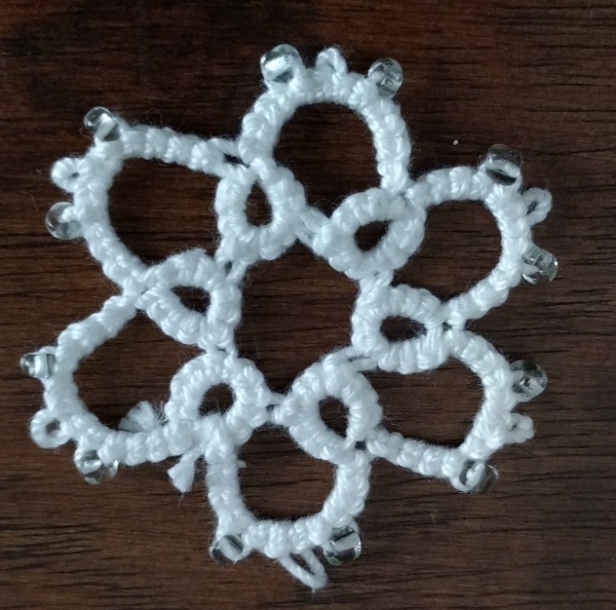
Here is the result of part one. I typically use a “finer” thread but decided to use a thicker thread so everyone could see the “knots” better I also added glass beads in some of the picots.
Part Two (Outer part of the snowflake)
* R 4 – 4 – 4 – 3 DNR
R 3 + 4 – 1 — 1 – 4 – 3 DNR
R 3 + 4 – 4 – 4 rw
Ch 10 rw
R 4 + 3 – 3 – 4 rw
Ch 7 rw Join to center picot of Round 1
R 4 + 3 – 3 – 4 rw
Ch 7 rw
R 4 + 3 – 3 – 4 rw
Ch 10 rw Repeat from ” * ” for a total of 6 clovers
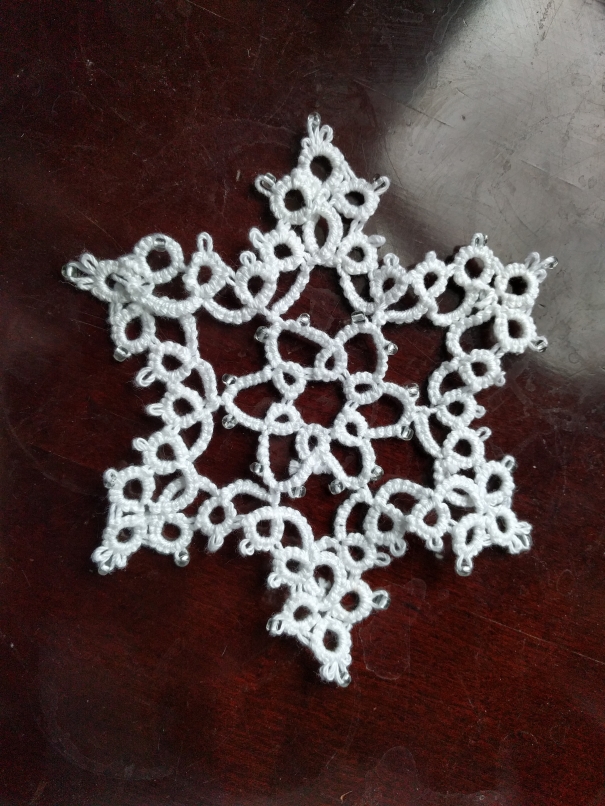
Final Snowflake
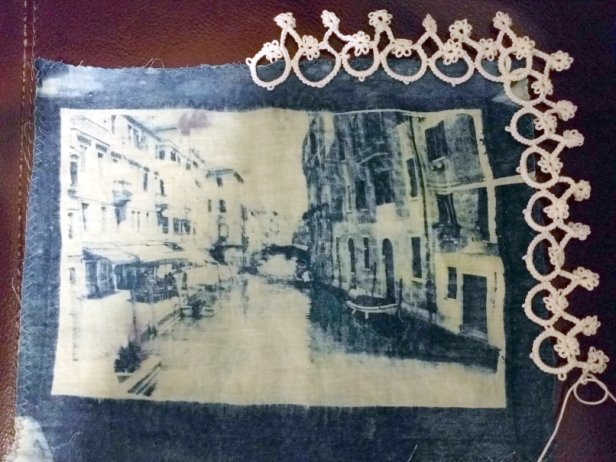
I didn’t just make a snow flake but started on a border for the cloth images of Venice I made several weekends ago (Here is a link to that post). I just started one border so I will follow up with the pattern in another post along with the video I promised.
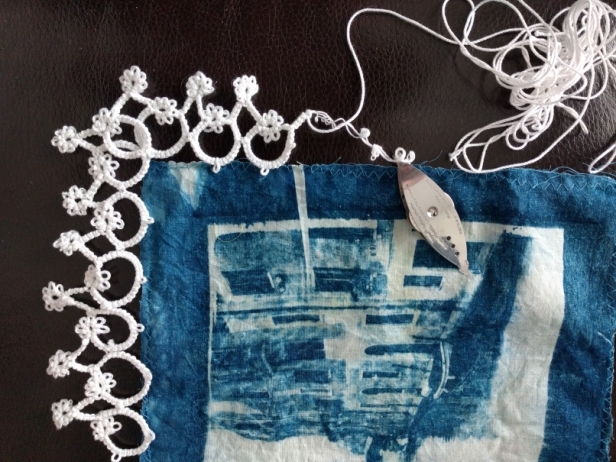
I will be using this edging to attach all of the different squares together. I am not sure if I want to place the edging on the outside as shown above… or place the edging over the tissue as shown in the image below. Let me know which of the two ways looks better.
By the way… don’t you think this would make a “lovely” fish net?

Tatting is one of those things I’ve been meaning to learn.
My mother tatts, but no one in our family is a collector/keeper of finished crafty stuff.
Post the video!
LikeLiked by 1 person
I will try to get it done this week or at latest this weekend… (thanks for reading my post)
LikeLike
I look forward to seeing it.
LikeLiked by 1 person
how beautiful that is! I’d love to learn but Mr Arthur Itis keeps me from doing so. sigh
LikeLike
I am sorry that you can’t try… Mr. Arthur can be a jerk!
LikeLiked by 1 person
Tonight I told my husband, “How does this guy find so much time!?!” Seriously though, you get so much done and it always seems like a complex, talented project. This was another example of that. At first I thought you sounded very “manly” because I know tatting as giving tattoos. Lol I quickly realized the word means something else to you. 🙂 I love the snowflake! And your fishing net. 😉
LikeLiked by 1 person
Thanks Ahmeli… I wonder how many people that I have told that I “tat”… thought I meant give tattoos… hmmm. (maybe I should give tattooing a try)
LikeLiked by 1 person
Ut Oh. 🙂
LikeLike
Very cool and in my books not ‘unmanly’ at all! Perhaps it could be at the origin of the expression, tit for tat?
LikeLiked by 1 person
thanks… I think I like your book if tatting isn’t “unmanly”…
LikeLike
This is so pretty ! I have tried tatting several times, and never managed it ! I tried the “little boat” technique and the needle technique, but I just don’t get it (and my eyes get quickly tired of it). I’d love a video ! I don’t think it’s unmanly at all (funny fact, if you said “Tatting” in France, people would think of you as a rad tattoo artist !)
LikeLiked by 1 person
I have never tried the needle technique (I was told that it was easier…). I will try to get the video up this week. Once you get the trick (there is a trick) it is very simple. You are the second person with the Tattoo… and when I tell people that I “tat”… I often don’t explain it… wonder how many think I meant tattoo?
LikeLiked by 1 person
Can’t wait ! I guess most people would assume tattoo, as very little people know about tatting ! Even my local yarn store had no clue what I was talking about when I was looking for a needle for frivolité !
LikeLike
I thought it was tattoos at first too 😆 Somehow this seems even more badass to me……
LikeLiked by 1 person
it isn’t as badass as tattoo… believe me… (which now I am going to have to try… wonder which kid will let me)
LikeLiked by 2 people
Thank you for stopping by my blog.
LikeLiked by 1 person
Fishing net, very very fancy fishing net. I’m glad you posted this; I’ve always thought tatting was complicated, but I watched some youtube videos after reading your post and it looks a lot less complex than I thought. I think I was confusing tatting and bobbin lace making. I didn’t think of tattooing, but if you do end up trying that form of tatting, I wish you luck in finding a test subject/canvas to start with. 🙂
LikeLiked by 1 person
I was hoping you were volunteering
LikeLike
I could volunteer a substitute that would spare both me and your offspring: perhaps a sedated pig? Isn’t their skin (along with other organs) a lot like ours?
LikeLiked by 1 person
tattooing a pig is cruel…
LikeLike
But not if the pig is sedated or (gasp) dead … ooo – that gives me an idea! You could tattoo cadavers! It’ll be like The Knick come to life! Or maybe just go the conventional route and ask an experienced tattooist what they recommend … I am but a humble observer with some odd ideas.
LikeLiked by 1 person
I knit, and I crochet, and I’ve always wanted to learn to tat. I’m so glad you posted this! I’m fascinated by tatting. Maybe one day I’ll finally figure out how to do it. 🙂
LikeLiked by 1 person
This is stunning work, I love the snowflake. Where do you think you get this knack of being able to turn your hand to almost any craft and moreover stick with it?
LikeLiked by 1 person
I am not sure that I have a knack… just kind of a curious guy… who loves trying anything… One thing is that I am not shy about failing. That is probably the thing that helps me the most.
LikeLiked by 1 person
Yes, many people are put off by the complexity and the time required to master a new skill or complete a project. but I’m sure you do have a talent for it too. 😊
LikeLiked by 1 person
Wow, that is talent!!
LikeLiked by 1 person
thank you…
LikeLiked by 1 person
wow, loved your snowflake, it looks amazing 🙂 you are super talented person! loved the idea, I would give it a try 😉
LikeLiked by 1 person
Thank you Lana! Give it a try (if you have questions or need help let me know)
LikeLiked by 1 person
Why should it be “unmanly?” Rosie Greer used to do embroidery! Many Football and Hockey players do ballet.
LikeLiked by 1 person