

I once was told “the second time is always easier”. ( actually I was told this by someone who accidently deleted something I had spent half a day creating… and it made me a tiny bit angry…) Here is my second attempt at weaving a rug with a frame loom. This will take more than a weekend (maybe that is obvious to most) but I will start the project “a new” this weekend. Here is a link to my first attempt (weekend with warp and weft).
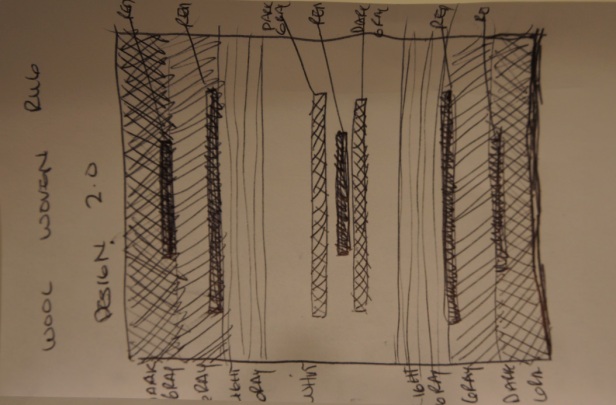
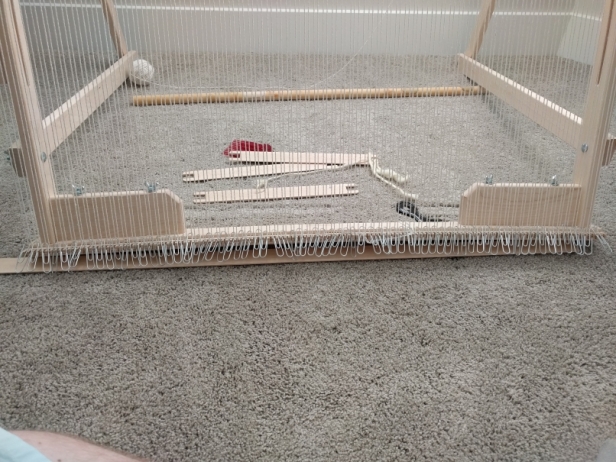
Let me share the original design and the failed outcome.
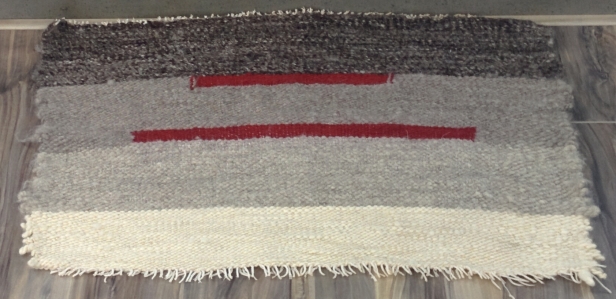
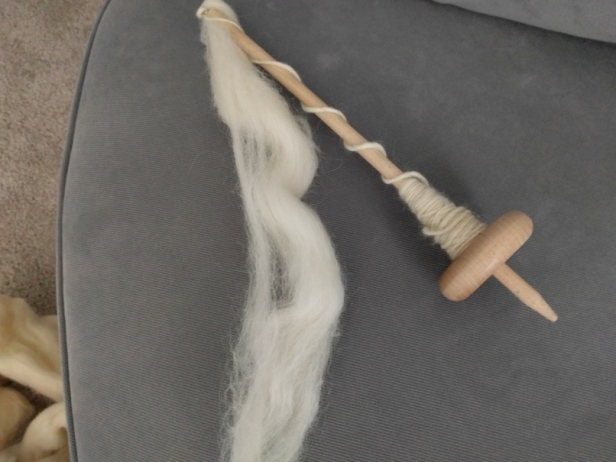
I am a bit sad that I was only able to complete just a bit more than a third of my design. I had to stop because it was starting to weave in. Weaving in is when both sides start to move towards the center instead of staying strait. I have been hand spinning and dyeing all of this wool and I could not bare to waste any more of the wool on a rug that was not going to turn out nice.
While on vacation I spent some time researching and reading about “weaving”. I have also visited many blogs and tried to learn not only from my mistakes but by learning from the experience of others. I also have a “clever” invention for a “paper clip” heddle that I am going to try on this project. (I think it is clever… we will see)
The rest of this post is going to be a “show and tell” on all of the things I have learned and hopefully will be doing better. Click continue if this is interesting to you.
I hope I can make this interesting… I would also welcome any feedback and advice… please … please… help me…
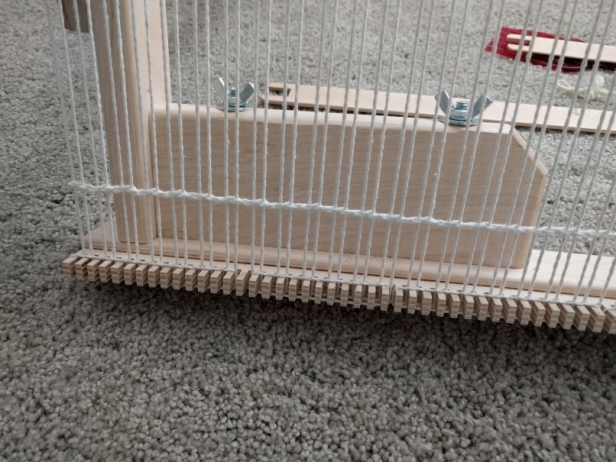
Improvement 1 – Strong and tight warp threads: I mentioned this earlier but I used a light weight thread on my first project and was not able to have a warp that was tight enough because I feared it would break the threads. Just before ending I had very loose threads. Not only was the warp too weak but it also stretched. I changed thread and worked the thread multiple times going back over and “retightening” (Is that a word?) it until the warp was very taut.
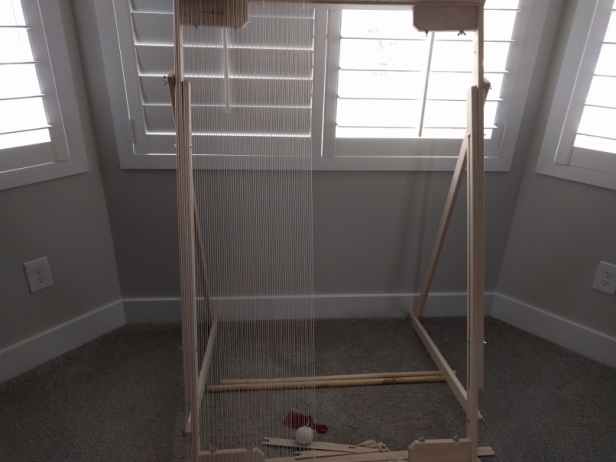
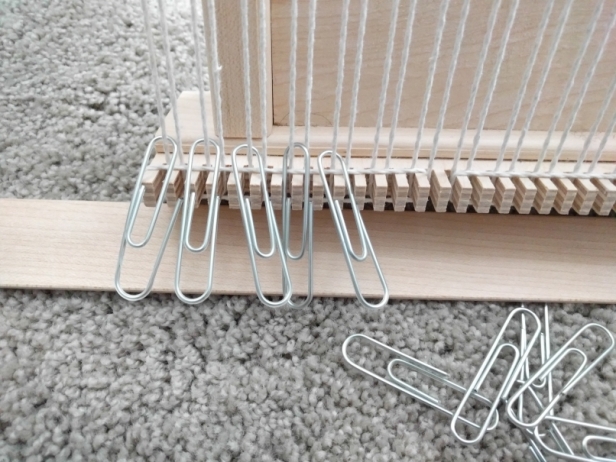
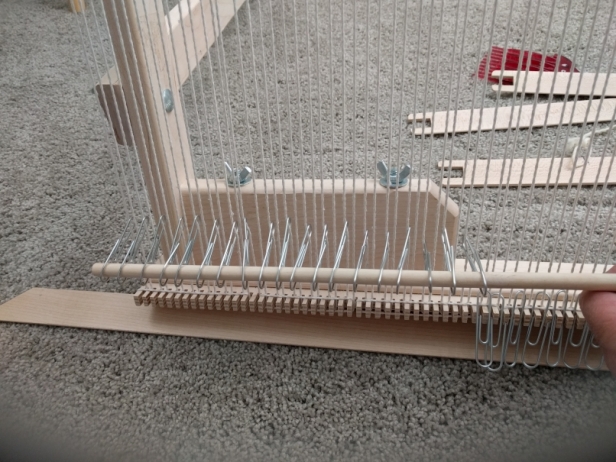
Improvement 2 – Heddle (my paper clip heddle): On the first attempt I was smart enough to have a “shed” bar that allows you to easily move the weft thread through the warp. But this was still time consuming… anyone that has tried to weave on a frame loom of any size realizes that weaving the “shed” bar above and below each warp thread can be very tedious. On my first project I realized quickly that I could weave a dowel into the warp thread leave it there and this made weaving the shed an “every other time” tedium. The dowel created the space for the shed when weaving the weft in one direction… but when weaving the weft in the other direction the threads need to be positioned in the opposite way… I would have to weave the shed through the weft by pulling thread up and pushing the other back…which takes lots of time
I needed something that would pull the “below-the-dowel” threads higher than the “above-the-dowel” threads so I could just put the shed in easily both times. Hence my do it yourself heddle.
Here are the steps to creating a do it yourself heddle:

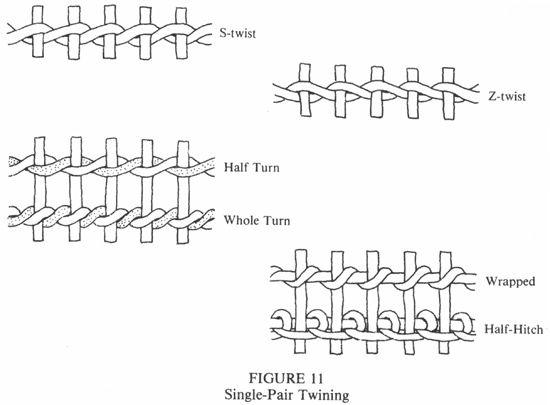
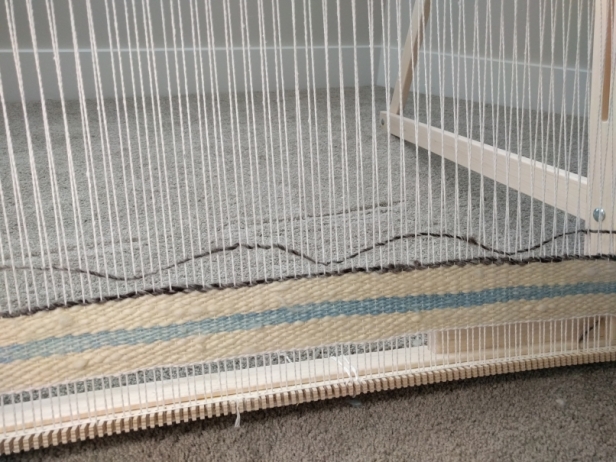
Improvement 3 – Twining: I did not do this on my first project and to be honest had no idea what it was. I read that for a frame loom the first step is twining the warp… Here is a picture of what twining is.
Improvement 4 – Looser Weft: Before I began last project, I had read that you should not pull the “weft” yarn tight because it would end up “weaving in”. I thought this meant leaving it loose on the ends, but it is more than that. I also thought that the “Beater” was to beat the thread down… (and I really beat it… causing the thread to be too tight) The yarn needs enough slack to move in and around each warp thread. If it is too tight you will have problems. I made two changes. The first was instead of just pulling the weft at a diagonal I placed it into a “scalloped” pattern. Then I pushed (not beat) the weft down onto the previous layer with care not to pull the yarn too taught.
Improvement 5- Design Change (start and end with white edge): Based upon the failed project I have decided to start with a white edge and end the same way. I do not think the dark gray with white warp threads looks good... and I noticed that the white side looked ok.
I have one last improvement to figure out. I do not know yet how to cut the rug off of the loom and finish the warp threads. I will be looking into this but would love any advice from any of you

I did not know that weaving is so intricate. Great job. And, the rug to my unskilled eye looks very beautiful. This looks fun!
LikeLiked by 1 person
thank you…
LikeLiked by 1 person
😊
LikeLike
All attempts are failures on some level, if you’re a perfectionist, but it’s all part of the learning process… Your rug design looked great and I’m looking forward to following your progress.
LikeLiked by 1 person
what great words of wisdom! Thanks
LikeLiked by 1 person
This is awesome!
LikeLiked by 1 person
Thanks Anna… I visited your blog… very interesting (I really like the “honest ads” )… definitely worth checking out for anyone else reading this…
LikeLike
Look up Damascus edging for finishing. It looks like you might not have much warp length for knotting a fringe which might reduce your finishing options a bit. Personal taste but I think the Damascus edging looks great. Good luck!
LikeLiked by 1 person
Thank you mosaic!! I will take a look into “Damascas edging”… Hope I didn’t start too low on the loom…
LikeLike
Cardboard makes a great spacer. Cut some cereal boxes into strips and off you go!
LikeLiked by 1 person
I’m curious to see how this second weaving project goes; your improvements and the design change are all very interesting. I love your paperclip heddle! I can confirm that yes, it’s very clever – an elegant solution to the problem. 🙂
LikeLiked by 1 person
thanks… I was wondering if anyone else thought the heddle was creative… I will post another picture in a week or two…
LikeLiked by 1 person
I made some placemats once and learned how to weave from my hubby’s co-worker’s wife. Her loom took up one entire room – it was very impressive. She weaved some pretty big tapestries!
LikeLiked by 1 person
I am often jealous when I see some of the looms others have…
LikeLike
If it makes you feel better, the first ‘loom’ I warped myself and used was a Navajo style loom built on the back of a chair while both of us had been drinking.
It was a disaster from start to finish (ie cutting it off the chair because we need the chair).
LikeLiked by 1 person
Thanks… the “chair” loom makes me laugh… would have loved to seen it
LikeLike
I’ll look. It was a terrible orange because drunk brain could only use cones for warp, and that was the only color I had (or probably could find).
LikeLiked by 1 person