

This weekend I made a beret and I am going to share with you how it was made. You may be wondering why I made this? (or if you have followed my blog maybe not… to quote a previous comment I “do weird shit“). It may become even more puzzling when I confess that I am not a fan of the beret.
So why?…. Let me try to explain… In early posts of this blog I confessed to having “urges” and well… here is another great example of me following an “urge”. I don’t want to sound completely out of control so I will try to better justify this project.
My motivation for this project was more about the “how” than the “what”. I have been fascinated with weaving and I read a blog post that showed how to “weave” a hat. I was drawn by the way that it was woven and the design of the loom. I am sorry that I can’t remember the blog and worse I can’t find it. If you are reading this and it is your blog please let me know in the comments so I can edit this post and give you credit!
UPDATE: a kind visitor (Zoe… in comments below) found the blog I got this idea from and provided this link. https://weavingahistory.wordpress.com/2016/11/17/a-hat-declared-done-revisited/
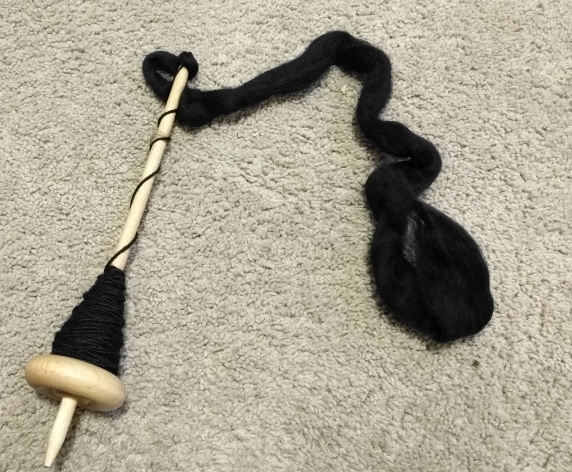
I will start with the wool… I have been spinning black wool for a rug I have been slowly weaving (Weekend with the Loom). I have extra black and have been wondering what I would do with this black yarn.
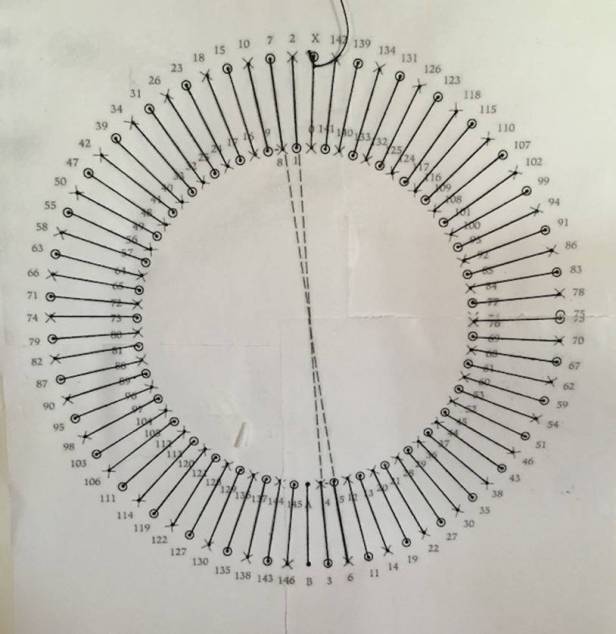
I found by happenstance the design for the hat loom and was curious about how it worked and the thought process for “inventing” this loom. (People can be so clever...). Above is the design for the loom and the numbers represent how the loom is warped. I was fascinated with the warping (putting the initial strings on) and that you would weave on both sides of this loom. I quickly got an old cardboard box and recreated this. I was not sure how well this would work so I didn’t take the time to make sure the circles were well drawn and that the holes were evenly distributed. This is a mistake if you want a well crafted hat at the end. I was not to worried about the lack of uniformity since again I was curious about the “how” and not so much about “what” I was making.
Looking back I am a bit embarrassed. I can hear my father saying “anything worth doing is worth doing well”. If I could go back in time I would to a better job of creating and warping this loom.
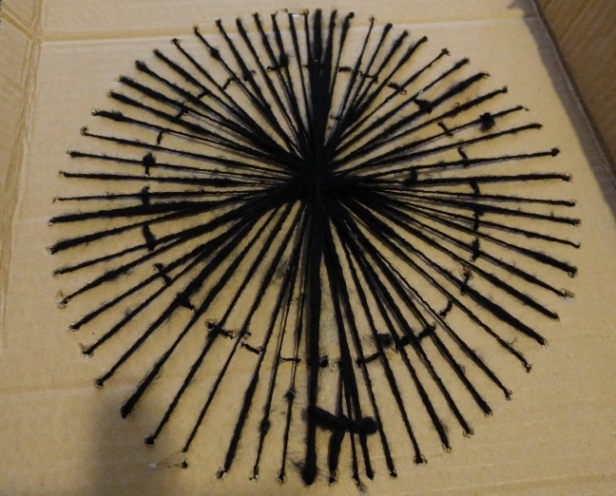
You can now see both sides of the cardboard and the warp strings. You can also see how quickly and sloppily I did this. (Post process I find that despite the poor craftsmanship the result is acceptable and shows how forgiving this loom can be)
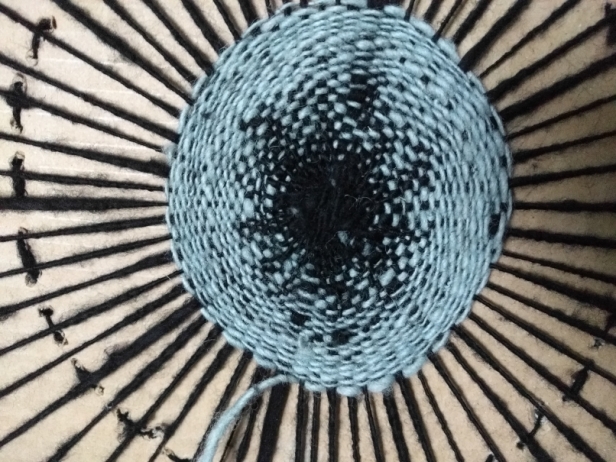
Once the loom was warped I started weaving the weft from the center in a circle around and around. I started with some left over black bean dyed wool since I didn’t have enough to do it all in black.
Here you can see that I started adding the black. I realized that I was going to run out of black and decided to “cheat” a little and use some blue yarn that I had purchased instead of making. (I think I am starting to sound really lazy… ). I also did not follow any pattern… just let it happen as I went.
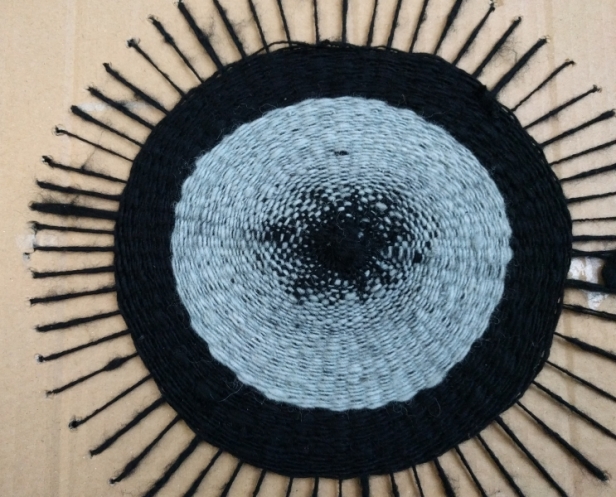
I don’t have the final picture of this side of the loom but here is one that is close. You need to weave the weft all the way out to the edge and it gets a little tedious at the edge.
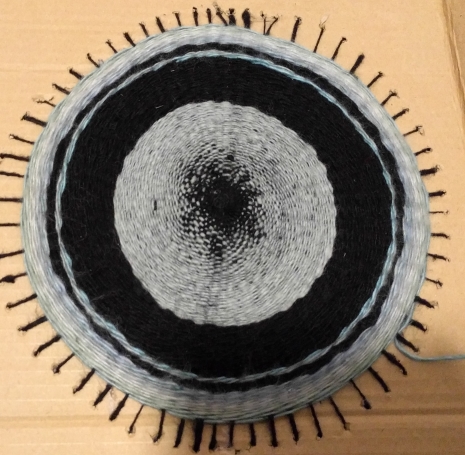
Once I had one side done I flipped it over and started the other. The only way I could make it work was to start from the inside and work out again. I also modified the weaving a bit because I was not sure that I had the “head” size correct. I left a gap by turning the weft back onto itself as you can see in this picture. This is definitely a fortunate happenstance not a well thought out design decision. This allows you to adjust the hat to fit exactly the way you want. I haven’t decided if I should sew this to fit or add some kind of fastener.
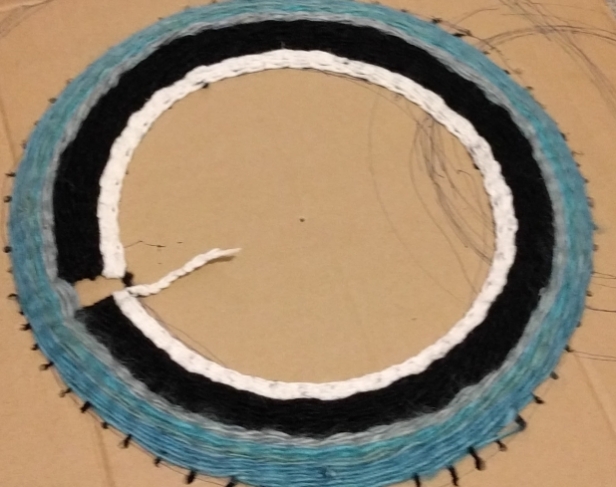
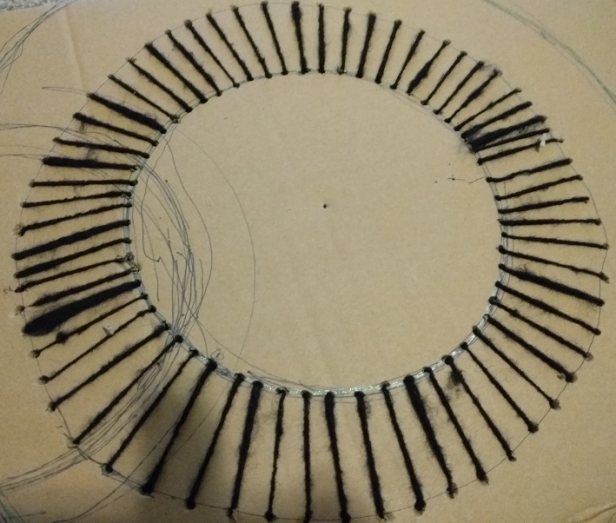
Here is the second side completely done. You will note that since I was sloppy that some places the warp is completely covered and other there is a small gap.
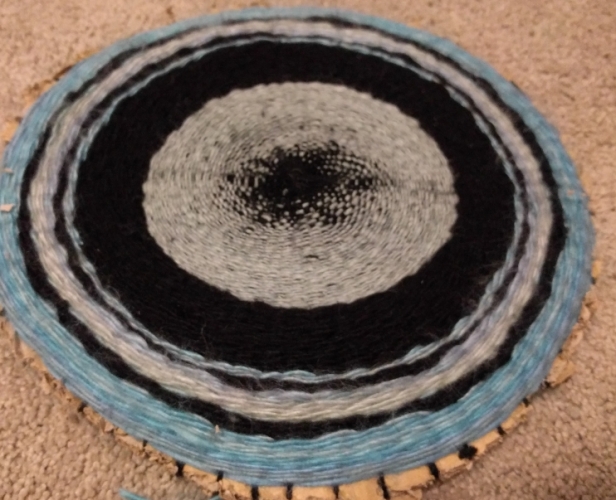
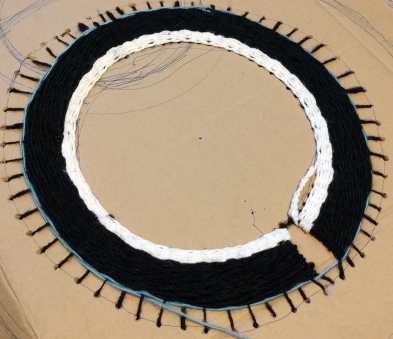
I cut the cardboard away carefully so that I didn’t cut any of the weft or warp. I was surprised that despite my sloppy loom creation I had a hat that look well… “good”. Here is a picture of me wearing it.

Boy… I hate taking pictures of myself and worse I look so “tired” kind of sad…and a bit (maybe more than a bit) dorky in this hat. This is definitely not a hat I would wear in public… But an interesting project. I think the hat would have turned out much better had I done it all in black. I also believe that if one took their time to create the loom correctly the beret would have turned out excellent… This is a great project if you are looking for something to weave… and if you are into berets.
That is all for this week… but please stay tuned… I had a wonderful gift sent to me from England and I will be blogging about that next week. I promise it should be better than this hat project.

My grand-daughter is a great weaver, she went to Peru and studied the techniques of a small rural community in return for helping them market their wares. I crocheted a beret in my teens, made it up as I went along, as you do’ it turned out surprisingly successful and my mum’s neighbour asked me to make one for her young daughter. It was a challenge to recreate since I didn’t write down the pattern or measurements. As with you, it was more about the process than the result, but it worked out.
LikeLiked by 1 person
I would love to visit Peru…I have watched many weaving and Wool dyeing videos from there….I think berets for girls and women are OK…. Not my choice for men…
LikeLiked by 1 person
This is genius! I would never have thought to weave something round. Of course I know nothing about weaving except for the wool loop potholders I did as a kid.
LikeLiked by 1 person
I thought it was clever… and that is why I gave it a try… I am sure that this is “old school” to many but I admire the person who thought this up. Kind of wish I could come up with something like this.
LikeLiked by 1 person
i have to admit, that while I found this absolutely fascinating and would adore trying it out..I have no bloody idea what you are talking about when it comes to the actual weaving and then getting the card board back out again…you DO take the cardboard out, right?
LikeLiked by 1 person
I just cut the cardboard out (probably not the best explanation)… if you cut the cardboard in a circle around the holes where the thread is going in and out the cardboard will lift out. It also helps if you cut the cardboard I the middle down he center.. (makes it easier to lift out)
LikeLike
Now this looks like a project I would tackle! How long did it take you? Do you simply just weave in and out around the initial black strings (so you say for lack of a more technical term – sorry)? Way to go! It looks good and I can’t believe you just randomly designed the pattern – it looks well planned out.
LikeLiked by 1 person
For weaving about 4 hours… spinning the wool takes loner. You simply weave under and over… but you must make sure that each row is the opposite of the previous row. Thanks…
LikeLiked by 1 person
Hmmmmm. Tempting.
LikeLike
I find that with fiber art stuff, a lot of imperfections come out in the wash, like your supposed wonky warping (I couldn’t tell). Yarn can be very forgiving. Looks fab!
LikeLiked by 1 person
Thanks madge…
LikeLike
I like this idea a lot. I think on the “back/underside” I might sew in a bit of elastic to close the gap and allow for sizing differences. In any case, good job! And, as another person noted, a wet finish will make things smooth out a bit. If very large, you could try a really hard wet finish with a dip in boiling hot water followed immediately by an icey bath to felt the thing a bit.
LikeLiked by 1 person
thanks for the advice….
LikeLike
One of the things I love most about your blog is that you are clearly so interested in process. The act of learning, trying something new, seeing if something would work that you’ve envisioned, I really appreciate reading that! And, I think it’s super healthy to connect with the making of a thing, even if it’s totally new to you. I wish I did it more often, rather than just thinking about it. I do, also, think the hat is super cool!
LikeLiked by 2 people
Thank you very much. I really appreciate you taking the time to read my posts… (I have always enjoyed your blog)
LikeLiked by 1 person
This is a really incredible project. I have never seen a round loom before. Congrats on the hat, and thanks for the weaving inspiration.
LikeLiked by 1 person
thank you for reading the post…
LikeLike
I just never know what you will come up with next/what you’ll say about it…and that’s what makes you so endearing and admirable…you have such a wonderful zest for life, and for sharing…and, your curiosity is a thing of wonder and grand entertainment….everyone should be as “weird” as you are…we’d all be so much more productive and interesting and happy. As for the final product, I think it’s fabulous; and I love that you took a photo of you wearing it… it put a huge smile on my face…you look so serious and it made me want to laugh and hug you until you started to laugh too….you never fail to delight, my friend…thanks for sharing 🙂
LikeLiked by 1 person
my wife always tells me I pull that horrible face when I try to take a picture of myself… she thinks it is hilarious… Not sure why I can’t pull off a good photo (must be thinking to much about it… especially if you think I look serious in that hat…)
LikeLiked by 1 person
Yeah, I was thinking you were being really lazy … I mean fancy using some yarn you had bought …. that is like me when I use milk from the shop to make cheese with …. lazy, lazy, lazy!
What a cool loom and project though. I especially love the black bean dyed yarn …. I so have to make space in my life for this kind of thing ….. I think the beret looks great on you 🙂
LikeLiked by 1 person
stay tuned for next weekend… there is some inky dinky doo work coming (wow I feel weird just saying that)
LikeLiked by 1 person
Inky Dinky Doo work sounds so cool, I am excited 🙂
LikeLike
I started making one of these berets in primary school (23years ago).. and I never got to finish as my family moved away. I been trying to find a pattern for this for so long so my kids can make one.. anychance you could let me know where you got this pattern? Please, it would mean so much to me.
LikeLiked by 1 person
I saved a picture of the pattern off of a blog and thought I had book marked the blog. When I tried to give the blog credit I couldn’t find the book mark. I will search and see what I can find. If not… you can use the picture and create your own… inner circle adjusts to the size of your head.
LikeLike
I know this was years ago, but I wanted to know what blog you got the info from too, so I reverse image searched the picture and came up with this https://weavingahistory.wordpress.com/2016/11/17/a-hat-declared-done-revisited/
LikeLiked by 1 person
thank you so much….I have wanted to find that post put a link in!!!!
LikeLike